


Nice interior detail:

and the Buchanan Kits Caley goods brake:

Andy had a go at a Buchanan Kits lattice-post signal this month. It was quite exacting to put together but the instructions were clear. He didn't claim it to be a perfect build, but said he'd learned a great deal for the next one! The finial is a work in progress. And, yes, the signal operates.

The demo this month was from Alisdair, who has been continuing to detail the sewage works destined for Tony Heywood's Hest Bank. He wanted a quick and effective way to fabricate the distinctive post-and-rail safety fences and ladders around the filter beds and the various tanks.

Rather than go the etch route, he decided to use copper wire from old GPO four-core phone cable, stripped of insulation and stretched straight with pliers. A simple jig was made by skrawking two parallel grooves into a piece of aluminium for the fence rails, with a series of short grooves at right angles to these for the posts.

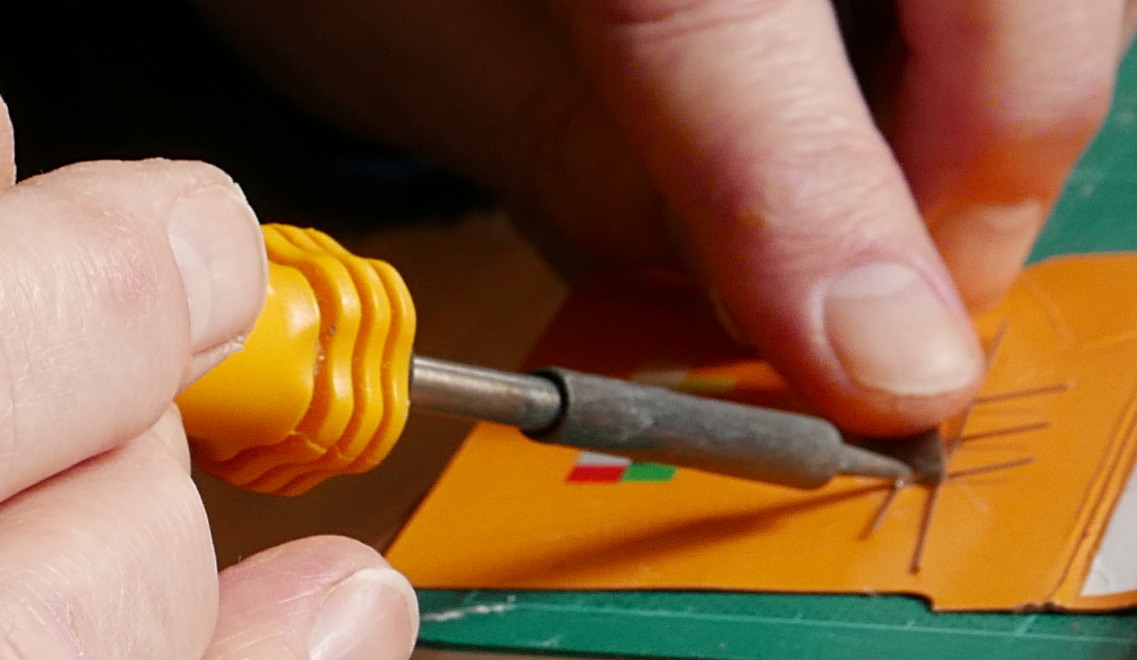
A length of wire, destined to be the middle fence rail, was aligned in the groove and held in place with "hot tape", then a fine file was used to cut a notch half-way through it at each post position.

A notch was also made in a length of wire destined to become a post.

This was then trimmed with a scalpel roughly to post height, erring on the generous side.

Small pieces were chopped from a length of solder, the junctions were fluxed, then the posts were tacked in place on the middle fence rail. No need to be too tidy at this stage.


The posts were now trimmed with the scalpel to be just short of the other groove, into which the top rail was then taped. The top rail junctions were fluxed and soldered in turn. Again, no need to make perfect joints - the idea is to get a roughly-accurate structure with enough strength to be handled. The tape was eased gently away with a scalpel blade and the blobby but square fence was transferred from the aluminium jig (which sinks too much heat to allow nice joins) onto a piece of card.

Now the joints were fluxed and worked over again with the iron, pressed down with a tool with a slight "click" being felt as the wire finds the notch. Care is taken to keep the joints as neat as possible.
Finally the emery board was used again to reduce any remaining large blobs and generally tidy up. The resulting fence can be inserted into its base by drilling holes for the posts; not all posts need to be "planted", it works well to plant every second or third one and trim the intermediate posts to size.
For the ladders, lengths of wire were squared off using a couple of strokes of an emery board on one side, turning over and repeating, then treating the remaining two sides: by no means perfect, but a few seconds' work produced a visibly squarer result. These were to be the ladder rails.

A single strand from a length of multistrand flex was gently straightened to be used as rungs. The jig this time was a 4mm strip of copperclad paxolin, a remnant from turnout construction in P4 days. The copper was eased away from the edges with by scraping with a scalpel, then slots for the rungs were scrawked in precise positions using a 1:10 slide board of the type written up by Geoff Jones in the 2mmSA magazine some years back.

The fine wire was now wrapped tightly round the paxolin strip and teased into place in the slots, then pressed down firmly with the rounded handle of a tool.

The rails were tacked at one end with solder then fluxed and held taut while working down the edges with a hot iron.

The hot tape is deployed again.

Blob size is less important than strength here. Any very large blobs are cleaned up with a touch from the iron, but the idea is to get a convincing impression at normal viewing distance rather than aiming at etch-precise ladder rungs.

The whole thing is then cleaned up with the emery board, the fine wire at the back of the jig is cut off with a sharp scalpel blade, and the ladder eased off the jig.

The sharp scalpel is used to trim any stray wires:

and finally a handrail can be added if required.

It looks convincing when placed against a filter bed, even without being tidied up further.

A quick look at some of the structures in the sewage works, still far from complete.


The safety chains across the fence openings are more pieces of fine copper wire.
That all took much longer to write than Alisdair took to do his demo. And then he whipped up bacon rolls, tea and coffee for his audience. We were duly impressed.
The rest of the afternoon was spent assembling and cleaning Sauchenford, then checking operation and making a list of the inevitable maintenance jobs which seem to sprout whenever a layout is left to its own devices for a few weeks.
Next month we'll be back in Edinburgh if all goes to plan, and before that we'll be manning the 2mmSA Roadshow stand at Model Rail Scotland. Do drop by to say hello if you're visiting the exhibition.
No comments:
Post a Comment